
© Copyright UAB “TableAir” 2021
All rights reserved.
No part of this manual may be reproduced in any form, by print, photoprint, microfilm or any other means without written permission from the publisher.
In spite of all care taken in composing the text and illustrations, neither the editor nor the publisher can accept any liability for possible damage that might result from any fault that may be in this publication.
Information in this document is subject to change without notice and does not represent a commitment on the part of TableAir.
User Manual version history:
| Rev. 1.0 | 3rd April 2019 | First Release. |
| Rev. 1.1 | 5th June 2019 | Updated screenshots, added detailed floor map update. |
| Rev 1.2 | 25th September 2019 | Updated screenshots, added connection to a hidden WiFi. |
| Rev 1.3 | 16th October 2019 | Added administrator booking editing option and syncing with Google Calendar overviews, added guest screen resource setup instructions, updated kiosk resource setup. |
| Rev 1.4 | 26th November 2019 | Google integration instructions, dashboard analytics description added. |
| Rev 1.5 | 4th December 2019 | WiFi signal strength instructions added. |
| Rev 1.6 | 13 February 2020 | Added instructions on assigning extra UIDs, wayfinding, WiFi strength heatmap instructions, updated CSV file upload instructions, occupancy heat map analytics instructions. |
| Rev 1.7 | 4th June 2020 | Updated user roles |
| Rev 1.8 | 6th August 2020 | Updated CSV install, added sanitation feature, booking types |
| Rev 1.9 | 25th November 2020 | BambooHR intergration added |
| Rev 2.0 | 6th January 2021 | Fixed O365 integration links |
| Rev 2.1 | 26th January 2021 | Guests tab description added |
| Rev 2.2 | 2nd February 2021 | Additional team, venue and workspace settings added |
| Rev 2.3 | 3rd March 2021 | QR sticker generation instructions added |
| Rev 2.4 | 16th April 2021 | Hierarchical venues added |
| Rev 2.5 | 20th May 2021 | User attributes, car spaces added |
| Rev 2.6 | 11th Nov 2021 | Additional settings added |
| Rev 2.7 | 31st March 2022 | QR sticker generation instructions updated |
| Rev 2.8 | 23 March 2023 | Overall instructions update |
Warnings and Statements
The exclamation mark within an equilateral triangle is intended to alert the user to the presence of important operating and maintenance (service) instructions in the literature accompanying the apparatus.
Read this manual before attempting to start up or service the product. Retain the manual for future use. TableAir accepts no responsibility for any consequential loss, failure or damage resulting from a failure to heed any warnings or to follow the instructions.
Warnings
All of the devices mentioned in this document may be operated only from the power adapter provided by TableAir. Operation from other supplies is not authorized.
Support services
Technical support
Should you need technical assistance please contact “TableAir” UAB.
Tel: +44 20 3322 4746
Email: support@tableair.com Web: www.tableair.com
Return Merchandise Authorization
Please contact us via the numbers above to receive an RMA number before sending your product back to us for repair. Products sent without an RMA number will be returned to the sender.
Software architecture
TableAir Cloud can be used together with other TableAir sensors or as a stand-alone software-only system.

It is also possible to use the sensor in a different architecture environment.
Introduction
TableAir Cloud is a powerful office space management tool that allows you to book work tables, and meeting rooms, and optimize your office space through real-time analytics.
This manual is prepared for administrators who are administering their company account.
Inviting your colleagues
Invite your colleagues to use the TableAir Cloud booking system by entering their email addresses into the input field.
While the invitation is pending it will be displayed as such (with an envelope icon):
Once the invitation is sent, your colleagues will receive the following email:

Once clicked the following form will open:

After filling out the form, the user will be automatically sent to the dashboard where he can access the floorplan and make bookings. To learn how to make bookings please refer to the TableAir Cloud Desk Booking System – Introduction
Note that this is not the only way to add users to the team. Later in the manual it is explained how to add users using CSV.
Users are also allowed to request access to the venue, your team URL is accessible by anyone, however only those users who receive your permission can access the booking module.
After entering your team URL into their browser, the guest visitor will see the following screen if they have a personal TableAir account (if they do not have a personal TableAir account, they will be asked to create one first):
After the user has logged in to their personal TableAir account they will be able to click the Request access button which will create a pending invitation, which you, as an administrator, have to either accept or reject in the Invitations/requests module.
Click ![]() to accept and
to accept and ![]() to reject the access request.
to reject the access request.
Sharing the team URL with all colleagues
You can share your team URL, so people would be able to request access to the venue. You will see all requests at the left of the screen, in the Invitation module – you’ve got 3 days to allow them to be part of the team and after 3 days, their request is canceled automatically.
Managing team user roles
Only administrators and owners can do changes to the team profile. To set the roles, mouse over the name of your colleague and click on the arrow on the side:
Click on the Role button and select one of the 3 options available (by default, all users are regular)
Regular user – can make bookings
Assistant – can make bookings on behalf of other users. Can be granted together with other roles
Admin – can overlook the team and change some settings
Owner – the same as Admin, but can also delete the team
In the following table team role permissions are explained.
| Regular User | Assistant | Admin | Owner | |
| Create/edit own bookings | ✓ | ✓ | ✓ | ✓ |
| See other bookings | ✓ | ✓ | ✓ | ✓ |
| Create and edit bookings for others | ✗ | ✓ | ✗ | ✗ |
| Edit workspace and user groups | ✗ | ✗ | ✓ | ✓ |
| Edit floor map (change resource position, floor map picture) | ✗ | ✗ | ✓ | ✓ |
| Create workspace resources | ✗ | ✗ | ✓ | ✓ |
| Create meeting room resources | ✗ | ✗ | ✓ | ✓ |
| Create parking space resources | ✗ | ✗ | ✓ | ✓ |
| Create Kiosk, Guest Screen | ✗ | ✗ | ✓ | ✓ |
| Create/edit venues | ✗ | ✗ | ✓ | ✓ |
| Set roles for other colleagues | ✗ | ✗ | ✓ | ✓ |
| Access to team analytics and other team settings | ✗ | ✗ | ✓ | ✓ |
| Delete company account | ✗ | ✗ | ✗ | ✓ |
| Remove users | ✗ | ✗ | ✓ | ✓ |
| Generate QR stickers | ✗ | ✗ | ✓ | ✓ |
After clicking the arrow you can also remove the person from the team (note: all his or her bookings will be lost and he/she will have to request access again in order to join the team).
Venue hierarchy
It is possible to create a sort of hierarchy between your venues. This feature needs to be enabled by your account manager.
Let’s say you have 2 offices, and you want to sort your venues based on these 2 buildings. The setup for this could look something like this:
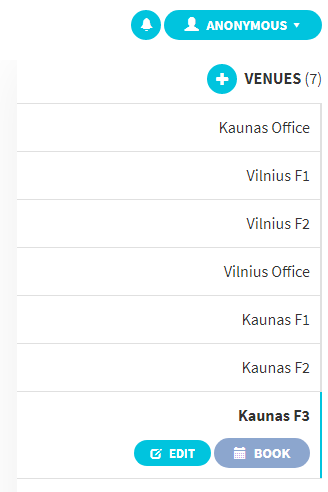
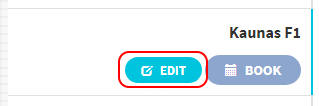
In the example, there are 2 building: one in Vilnius, one in Kaunas. They have 2 and 3 floors, respectively. We want to sort them using hierarchy. To do that, select the venue that is to be a child and click edit on the left:
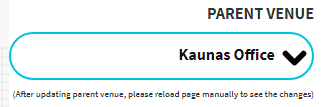
One of the settings allows us to select the parent venue:
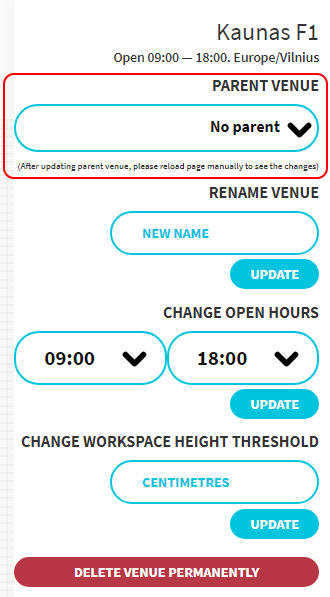
Continuing the example, we would select Kaunas Office as the parent for Kaunas F1:
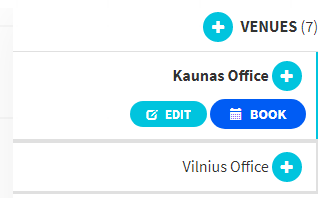
For the changes to take effect we need to manually reload the page. After that we will see that the venue Kaunas F1 is hidden and that a new button has appeared near the Kaunas Office venue name:
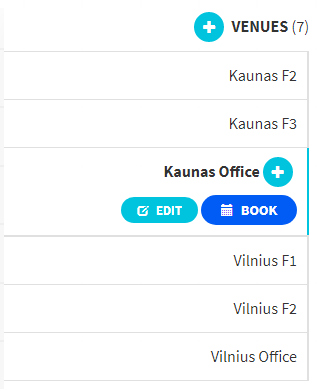
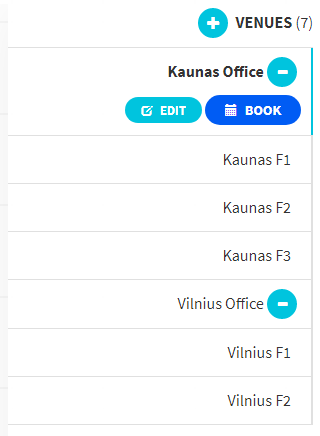
If we click on the plus sign near the name, all the children of this venue will be shown:
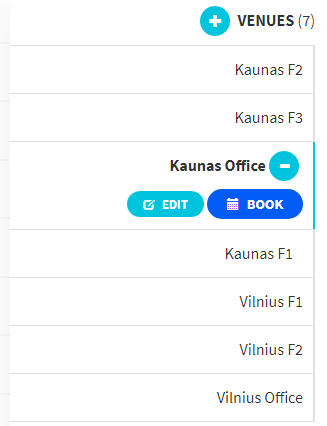
Now we do the same for all the other floors and offices.
The final result would look like this:
Of course, children of the parent venue can also have children, and these children can also have children etc. Feel free to experiment with the set up!
NOTE: this feature needs to be enabled manually. Please contact your account manager or support@tableair.com.
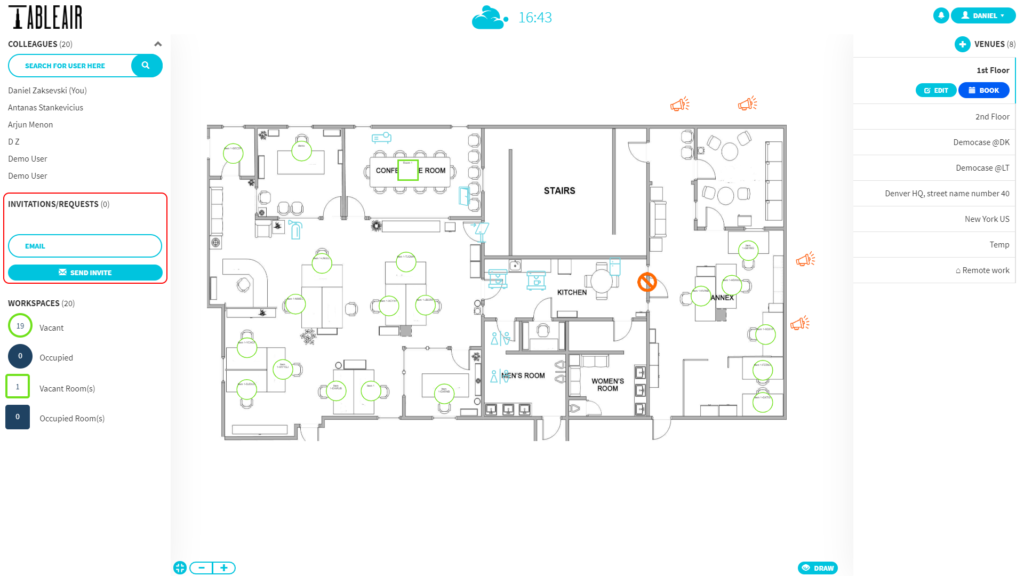
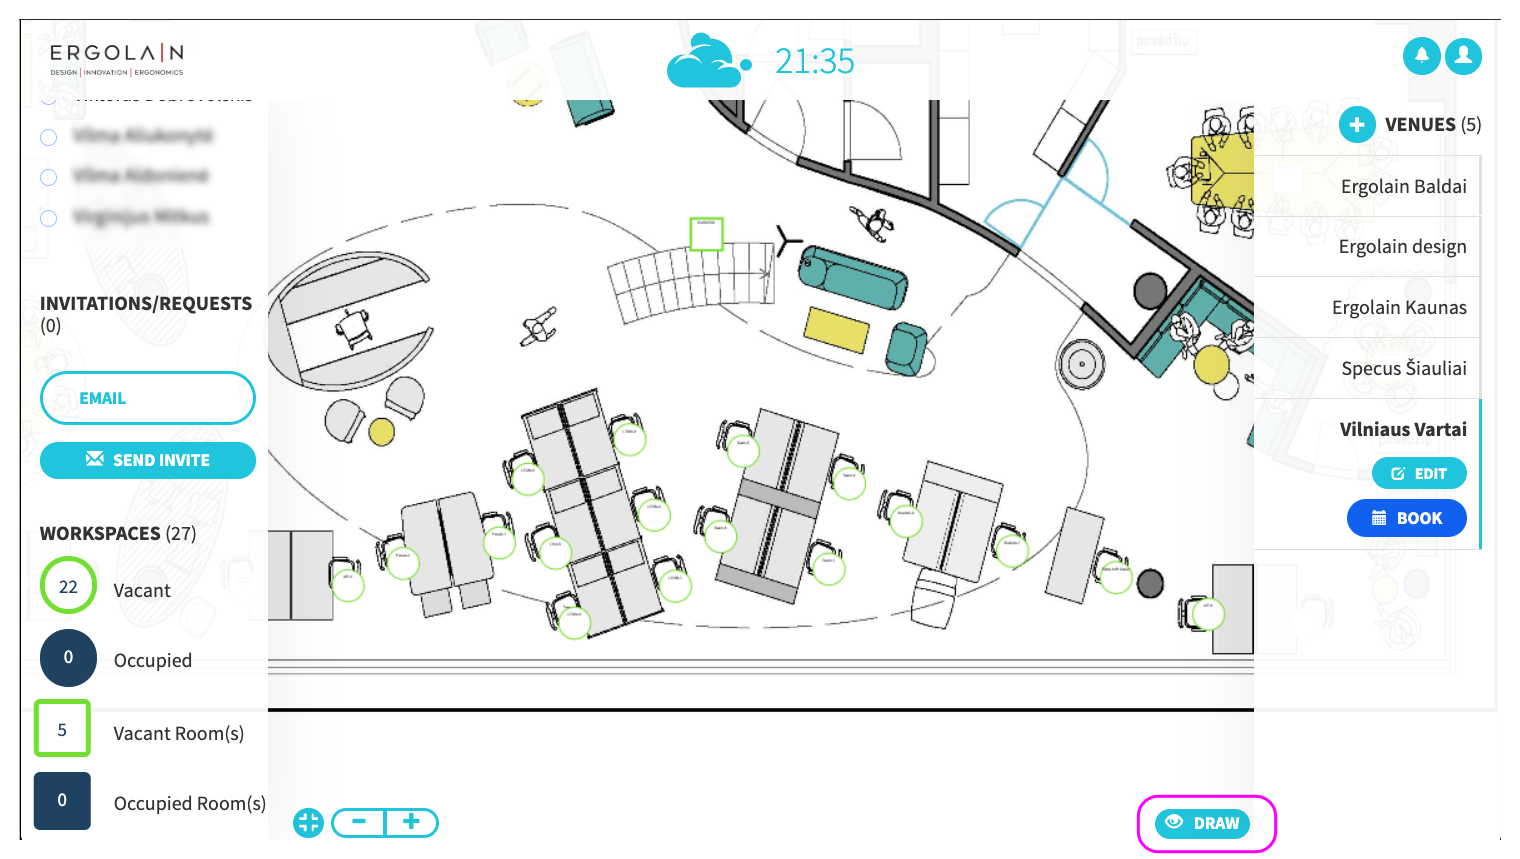
Creating the venue floor map
Use the draw mode by pressing the DRAW button to create a floor map. To make floor maps more understandable for your colleagues, we recommend you using icons. You can always change the position of the tables by selecting and dragging them to other locations on the floor map.
Editing the floor map
Once the “Draw” button is clicked a bottom panel will open. Please select “Background” tab (A.). A panel will appear:
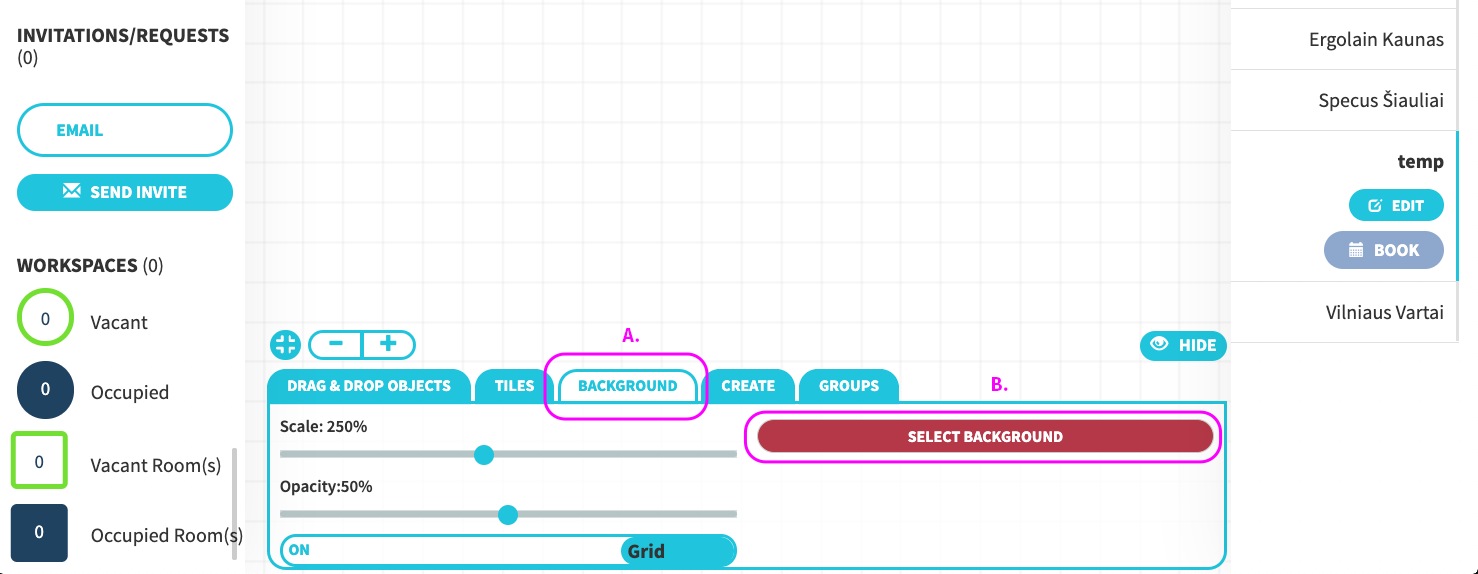
Please click the “Select Background” button (B.). An explorer window will appear. Choose a JPEG or PNG image no larger than 4000×4000 pixels and no bigger than 2mb. A thumbnail preview will appear in the background. Click “Upload file”

Please be patient and wait until the floor map appears in the background.

Once the floor map image appears in the background select suitable Scale, and Opacity options. Once happy with the settings click Hide. The floor map is now visible to everyone in the team.
Creating item resources
Click the “Draw” button at the right bottom corner
A panel at the bottom of the screen will open. There, select the “Create” (A) tab. Drag and drop a resource (B) on the floor map. The item will be created.

All resources require licenses to be purchased. If you get an error, saying that you need to purchase a license, please contact your account manager or support@tableair.com.
More on booking workspaces here.
More on booking meeting rooms here.
More on booking parking spaces here.
Removing resource from a venue
First, open the browser and enter your team unique URL and log in with an administrator account. Then:
1. Select the resource you want to remove.
2. Click Remove bookable from the venue button.
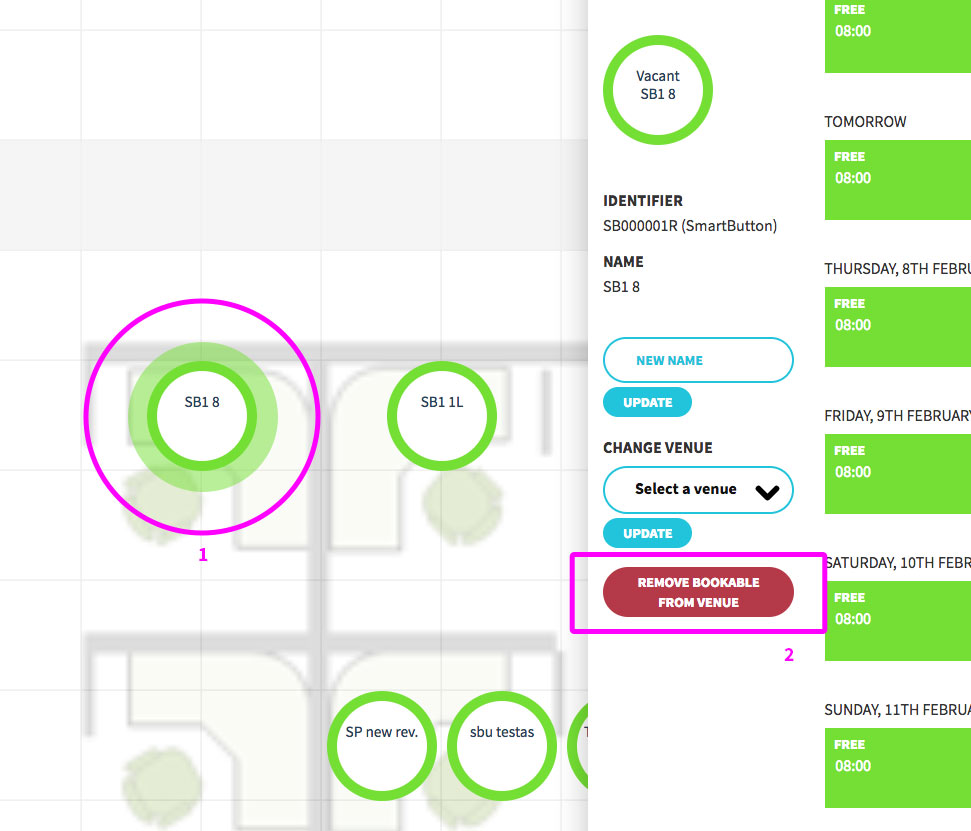
The resource will be removed
Creating groups
Groups give the ability to administrators to choose which users have access to which workspaces. Multiple users can be included into multiple groups with different workspaces. Groups are not mandatory and if it is chosen not to create groups all users have access to all workspaces.
First, open the browser and enter your team unique URL and log in with an administrator account, then:
- Click “Draw” at the bottom right corner.
- Select “Groups” tab. Click “+ Create new group”.
- A group will be created and a window on the right opens. By default groups are given names by default. You can update by entering New name and clicking update on the right side.
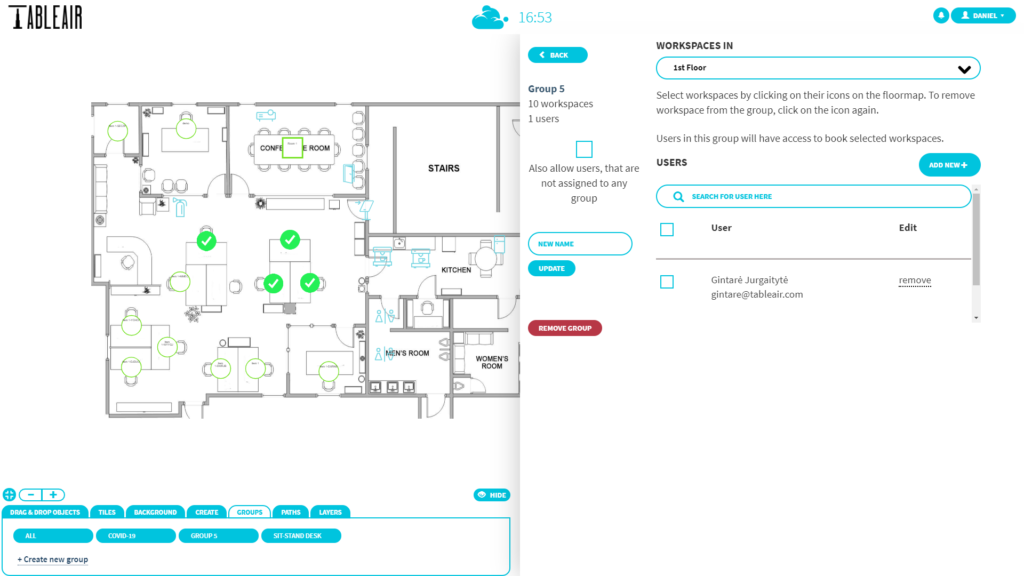
Select which desks are included into the group by simply clicking on the workspaces on the left side floorplan view. Selected workspaces will have a green color with a white check mark in the middle.

Note: administrators will have a right to book any desk and have immunity of limitations created by groups.
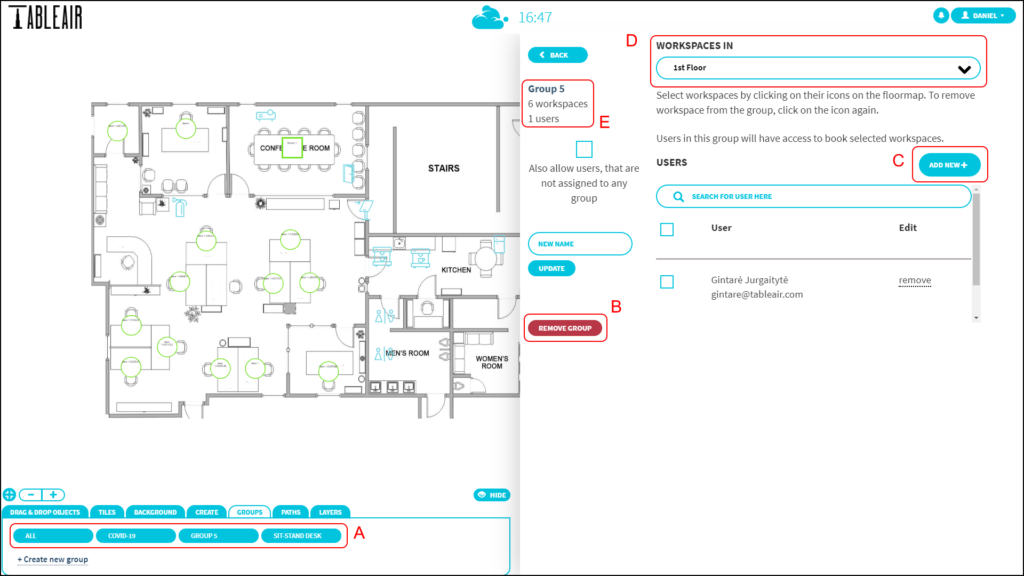
Module explanations:
- A – When multiple groups are created you can select them, and create new ones here.
- B – Remove group option.
- C – Add new users to the group.
- D – Select which venue is displayed on the left side floorplan view.
- E – The total number of workspaces and users in the group.
- Click on the workspaces on the left of the floor map to select which of them are included into the Group .
- Then click on “Add new +” under the users module (figure C.).
- In the pop up select your colleague from the list, click “+” and “Done”. You will see your colleague appear under the Users list as well as (figure E.) will be updated with corresponding number of workspaces and users in the group.
- To remove a user click “remove” next to their name. To remove a workspace from the group, click on selected workspace and the checkbox will be removed.
Video explanation:
Special groups
Currently there are 2 special groups: open for all and closed for all.

Workspaces added to these groups will have special permissions depending on the group. If added to the group open for all workspaces will be available to all users, overwriting other permissions set by other groups. So these desks will be always bookable to all users. Workspaces added to the group close for all will be unavailable to all users, also overwriting permissions set by other groups. So these desks will be no be bookable by anyone (except admins).
Adding workspaces to these groups is the same as with all other groups – simply click on the group and while it is open, click on workspaces. Once added, they will show up with a green checkmark.
Editing colleagues’ bookings
As an administrator, you can edit or remove any bookings your colleagues may have made. First, you need to go to your dashboard while logged in with an administrator’s account.
In the ‘Bookings’ section, you can see all the bookings in your team.
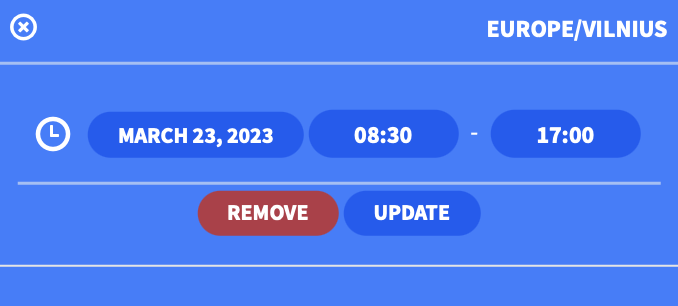
By pressing the ‘Edit’ button on the right of any booking, you can edit the start and end times, or even remove the booking.

Booking types
There is a possibility to change the booking type of the bookable item. Meaning that you can set for how long will bookings be created on a particular bookable item. There are three booking types available: hourly, daily, and weekly.
With hourly, you can create bookings with minute precision, for example from 10:23 to 18:55.
With daily, you can book only particular days. So the booking is made for the entire working day. You can book only for the current week, and on Friday you can make bookings for the next week (depending on your team’s options).
With weekly, you can book only entire weeks. Bookings can be made only 2 weeks in advance.
To change the booking type, click on a bookable item you want to edit and you will see these options on the left of the booking timeline. Simply click on the option you want and it will change immediately. This change affects only the bookable item you have selected.

Additional team, venue, and workspace settings
There are quite a bit of additional settings used to customize your experience while using our system. Most of the settings below can be set such that they apply to the entire team, particular venues, or particular workspaces. The settings are as follows:
| Autobook duration The duration of the booking automatically created by a sensor when person’s presence is detected. |
| Autorelease duration The amount of time the workspace stays booked when person’s presence is not detected after check-in. |
| Check-in duration The amount of time in which you need to check into your booking before it is canceled. |
| NFC card booking duration The duration of the booking created using an NFC card. |
| Maximum booking distance The amount of days into the future when creating a booking is allowed. |
| Allowed tabs Which tabs will be available for users in the dashboard (tabs are explained below). |
| Login providers Allows to choose which login providers (TableAir, O365, or Google) to show on the log-in page. |
| Allowed booking days Days of the week on which users are able to create bookings. |
| Allowed languages Allows to force the language of the TableAir system to users (currently the language of TableAir will be the same as the browser) |
| Sensor check-in Allows to use sensor person presence detection as check-in. |
| Venue hierarchy Allows to create a hierarchy of venues (e. g. office location -> buildings -> floors). |
| Covid form A questionnaire that users must answer before booking a resource. Questions are provided by the administrator. Additional setting: Email with the information An email is sent to all administrators if a question is answered NO |
Currently, these settings can only be enabled by TableAir employees. Contact your TableAir team manager or support@tableair.com if you want these settings changed for your team.
Dashboard
Team settings
There is a number of additional team settings available for administrators to set.
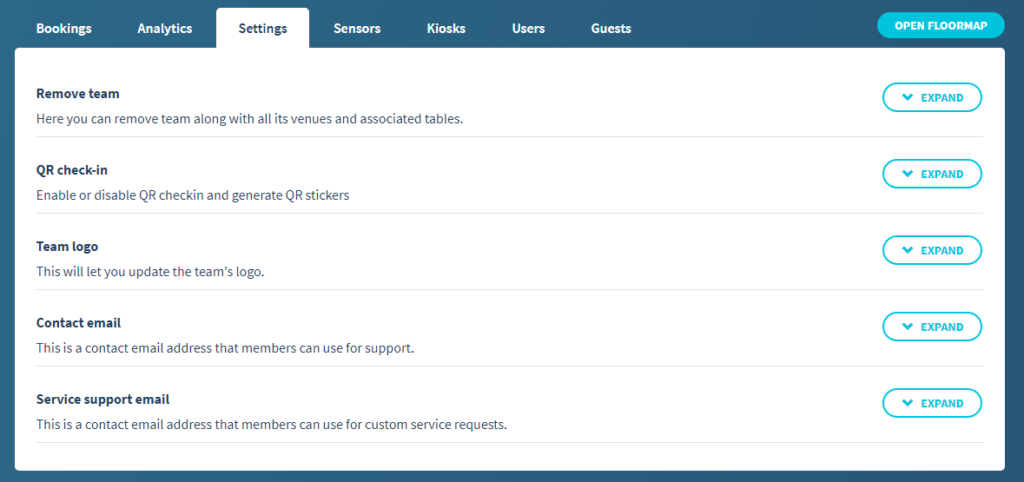
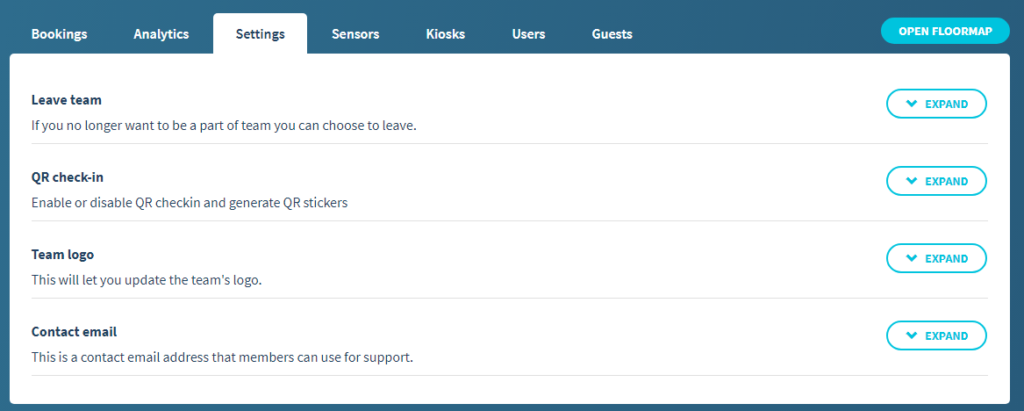
There are currently 5 expandable settings that you can access:
- Remove team – used to completely remove the team. Please be careful not to delete the entire team accidentally
- QR check-in – more information can be found here
- Team logo – used to change the logo that is displayed at the top-left corner of the floor map
- Contact email – this email is shown to a user when some error occurs that requires administrator support
- Service support email – this email is the receiver of service requests that are sent when creating meetings. More information can be found here
Wi-Fi indicators
In the Sensors tab of the teams’ dashboard, you can see the WiFi signal strength of each of your devices. This gives you valuable insight into whether your device is connected to the Internet and thus whether it will be able to work properly.

You can estimate the connection strength based on the color in the WiFi signal column.
- Red – the signal strength is critically low. The device may not be able to work properly.
- Yellow – the signal strength is moderate. The device may be able to work properly.
- Blue – the signal strength is good. The device will work properly.
- Green – the signal strength is perfect. The device will work properly.
Always try to maximize the WiFi signal strength in order to have the best experience using the devices.
If the device is offline (in the Actions column), then the WiFi signal strength shown is the last known state of the device. Thus, if the device was never connected to the Internet, the WiFi signal column will be blank for said device.
You can choose to enable WiFi indicators or a WiFi heatmap in the RSSI tab in your venue.

ICONS:
In the floor map the devices have little icons near them indicating the WiFi signal strength.


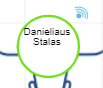

The same color scheme as in the dashboard applies here, however a red dot means that the device is offline (not connected to the Internet) please make sure your WiFi SSID is not changed or the sensor is correctly powered.
HEATMAP:
If you enable the heatmap setting, you will see big, semi-transparent circles around every device. The color scheme is the same as with icons and in the dashboard.

This will show you in what places your WiFi signal is good, and where it is bad.
Firmware update
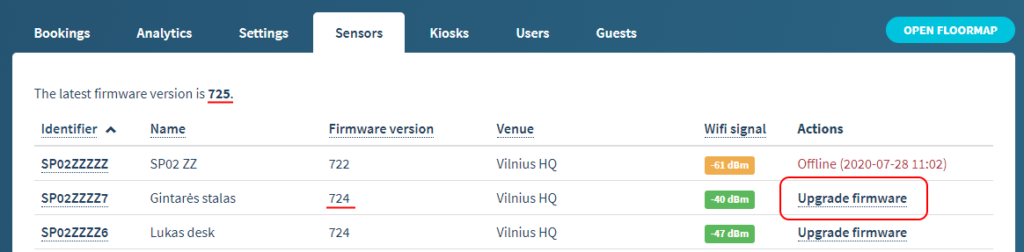
For the device to work properly it must be up to date. Firmware updates are released regularly and upgrade various parts of the device. You can see the latest firmware version in your Dashboard under the Sensors tab.
In the same Sensor tab in the Dashboard, you are able to see the current firmware version of all of your devices.

There are a couple of ways to update your firmware.
Firmware update using the Dashboard
If the device is connected to the Internet and there is a firmware upgrade available, you will see it in the Sensors tab in the Dashboard. Under the Actions column look for the Upgrade sensor button.
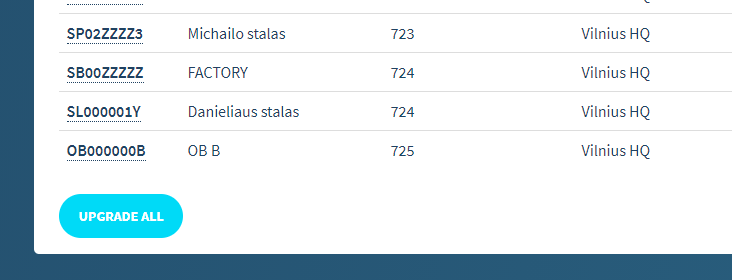
It is also possible to update all of the devices by clicking the UPGRADE ALL button which is located at the bottom of the Sensors tab.
Assigning NFC cards to users
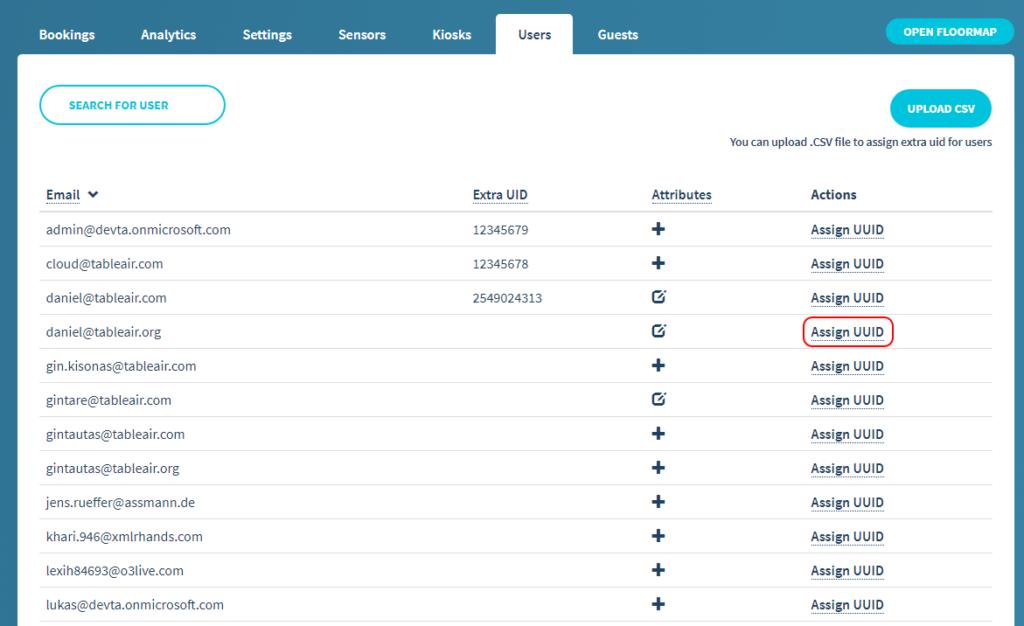
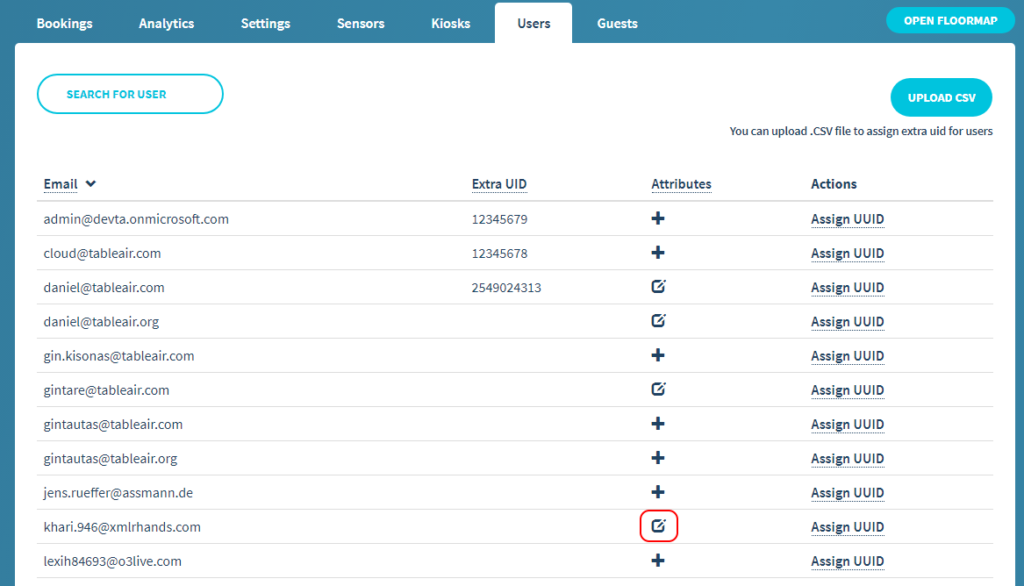
In the Users tab, you can see all current members of your team. Their email address, extra UID, and available actions are shown.
To assign an UID to a user, simply press Assign UID in the Actions column.
In the pop-up window enter the UID of the NFC card and press Assign.

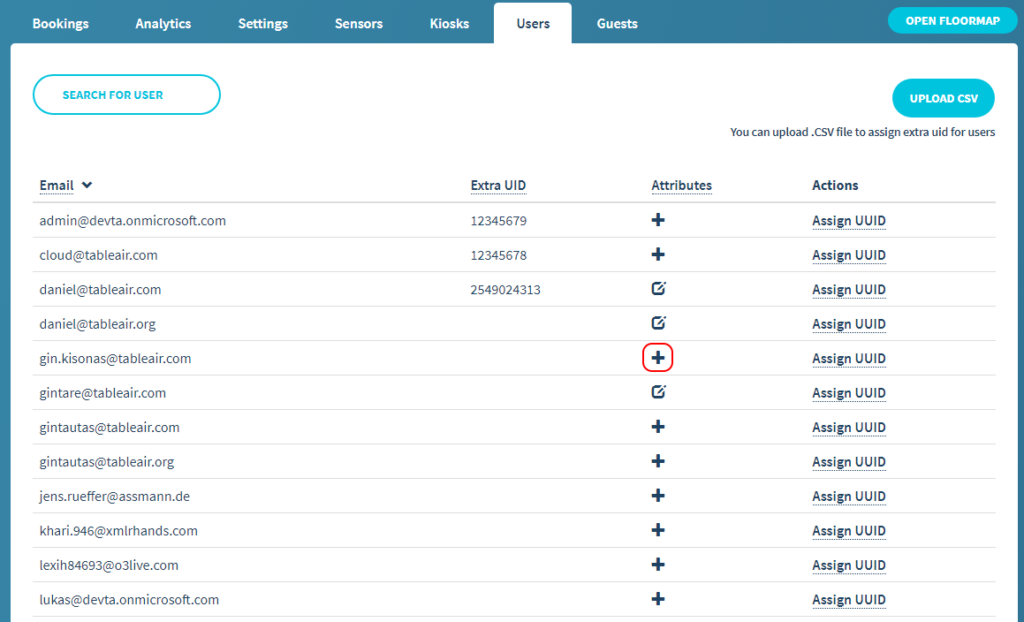
Adding additional attributes to users
You are able to add additional attributes to the users of your team. Press on the plus sign in the attributes column to start adding attributes.
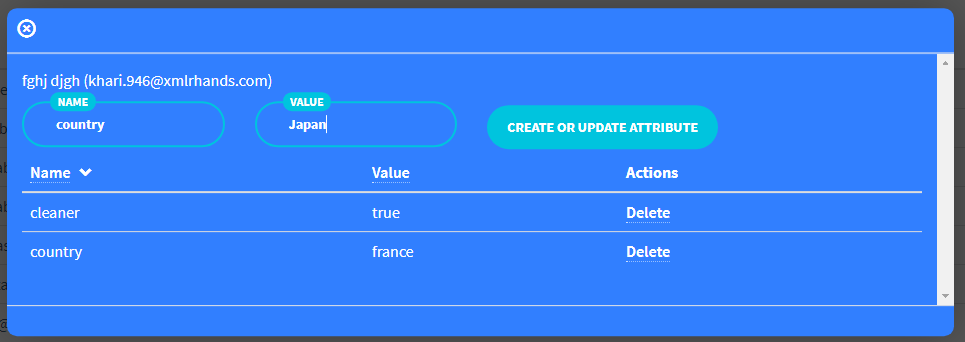
Once you do that a pop-up will appear
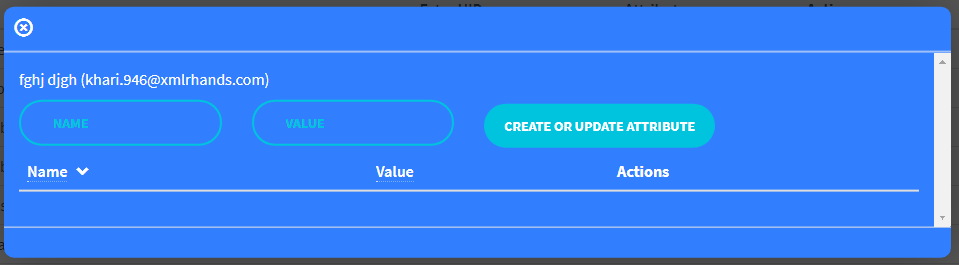
- Name – the name of the attribute. E. g. country, office, cleaner;
- Value – the value of the attribute. E. g. France, Vilnius Office, true.
Once you enter the attribute name and value, click on the button on the right
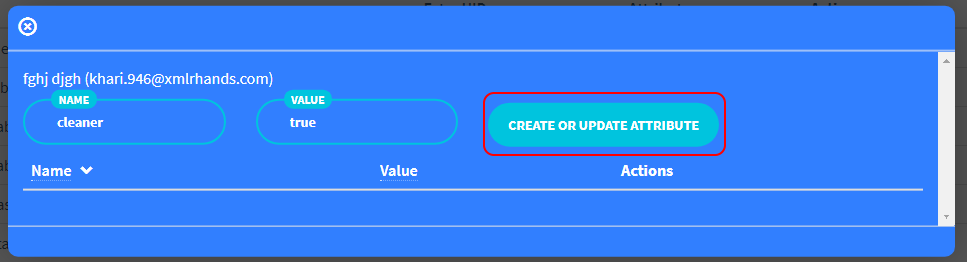
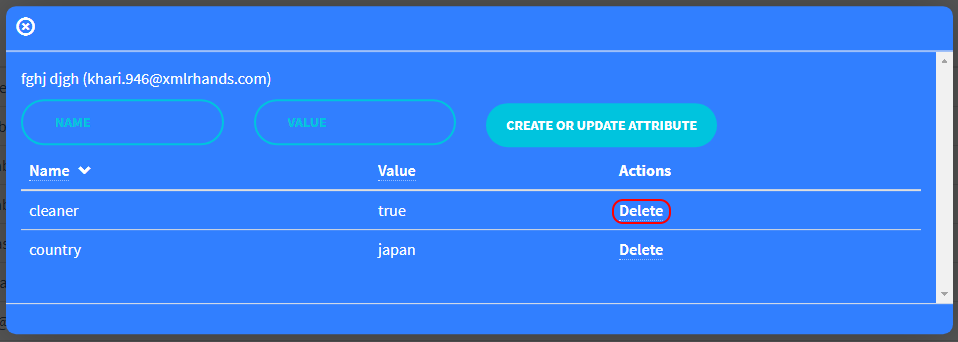
All the attributes of the selected user are shown in the lower part of the pop-up
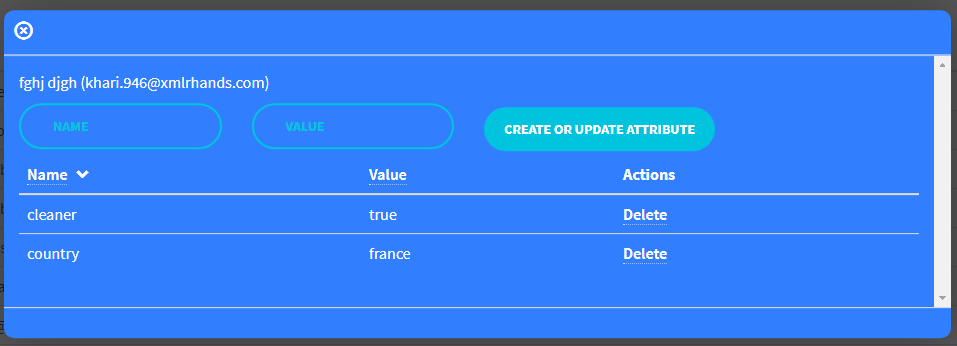
If a user already has additional attributes added, the Attributes column will reflect that by having and EDIT button in the column
To edit attributes, click on the EDIT button in the attributes column and a pop-up will appear. Enter the attribute name you want to edit and enter the new value for the attribute
And click the button on the right
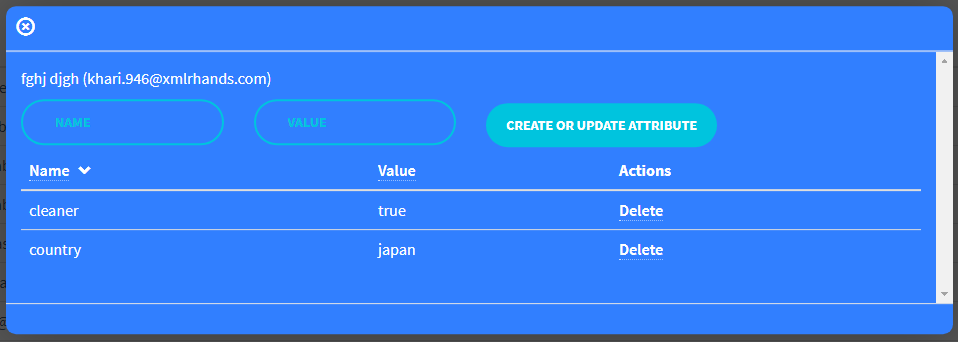
To delete an attribute, click the Delete button in the Actions column in the row of the attribute you want to delete
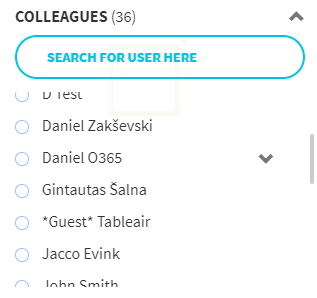
User are able to search by the attribute values in the Colleague section in the Floor map.
Adding users and updating current users’ data
You have the option of adding a lot of users to your team quickly.
If you go to the Users tab in the dashboard you will see the Upload CSV button.

After pressing it, a pop-up will appear:

All the new users you add will receive the welcome message, which is shown in the text box. You can edit this message and write your own unique welcome!
When done, press the Select CSV and confirm the changes button. You will be asked to upload your CSV file.
CSV stands for comma-separated values. Allowed fields are:
email | first_name | last_name | groups | nfc_id
You do not need to include all these columns. Just include the values you need.
So, for example, if you would like to add 2 NFC UIDs, your CSV file would look like this:

If you would like to add some new users with NFC UIDs assigned, then your CSV file would look like this:
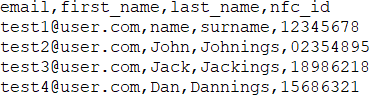
NOTE: the password will be automatically generated
You can also add new users with groups automatically assigned. The file would look like this:

Note the first line, that every value is separated by a comma and that there are no spaces.
When you have your CSV file ready, just press Upload CSV and find your file. If your CSV file was correctly formatted, you will see pop-up with the information about the users:
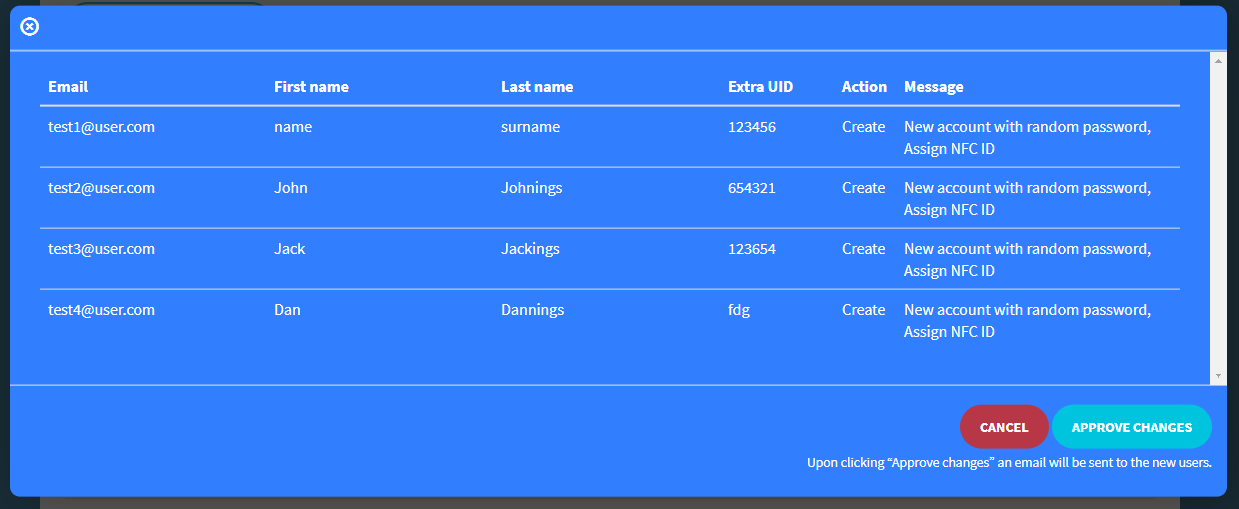
This pop-up shows the data received from the CSV file.
Action – the action that will be performed on specific used data, e.g. Update, Create, Skip.
Message – detailed explanation about changes will be made.
Video explanation:
Guests tab
Guests tab in the dashboard shows all information on your teams’ guests. Guests are external users (not members of your team) that are invited to meetings in your meeting rooms. More information on how to invite guests can be found here. More information about the guest check-in process can be found here.
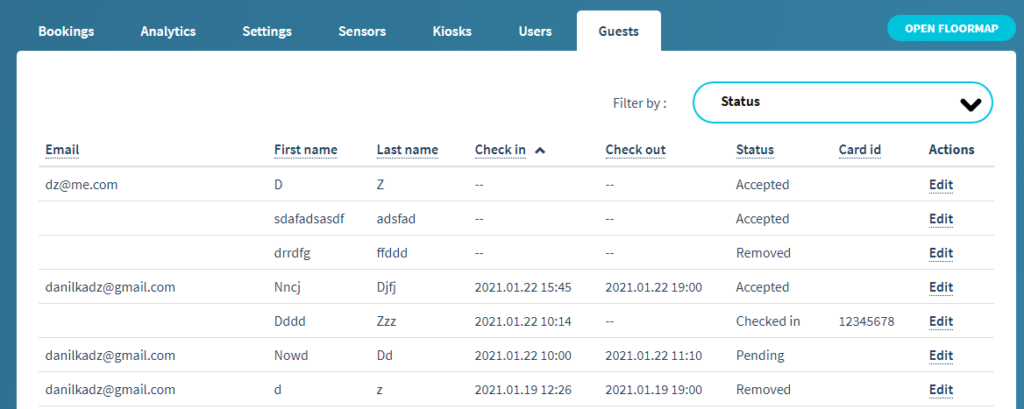
The Guests tab looks like this:
During every step of guest management everything is updated automatically. Meaning that all the changes are automatically shown in the tab without the need to refresh the page manually.
These are the fields currently available in the Guests tab:
- Email – the email of the user
- First name – first name of the user
- Last name – last name of the user
- Check in – the date and time of user check-in. If there was no check-in yet, — is shown.
- Check out – the date and time of user check-out. If there was no check-out yet, — is shown.
- Status – the status of the user (you can find the status explanations below)
- Card id – the id of the NFC card used during check-in
- Actions – the option to edit the entry
There is also a possibility to sort by these fields. Clicking on the appropriate field name will sort the entries based on the specific field (alphabetically or numerically).
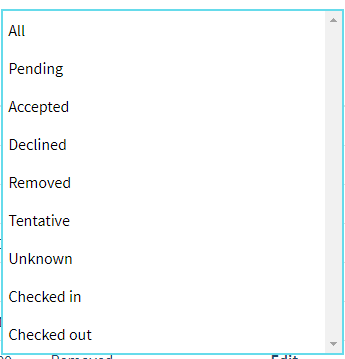
Currently, there are 8 statuses available:
- Pending – the external user was invited to a meeting but did not yet accept or decline the invitation
- Accepted – the external user was invited to a meeting and has accepted the invitation
- Declined – the external user was invited to a meeting and has declined the invitation
- Removed – the entry was removed by an admin using the Actions field
- Tentative – specific use cases, not applicable
- Unknown – specific use cases, not applicable
- Checked in – the external user has checked in to the office using an NFC card
- Checked out – the external user has checked out of the office using an NFC card
It is also possible to use filtering to show only entries with a particular status. This is done by clicking on the field to the right of Filter by: and choosing the appropriate status.
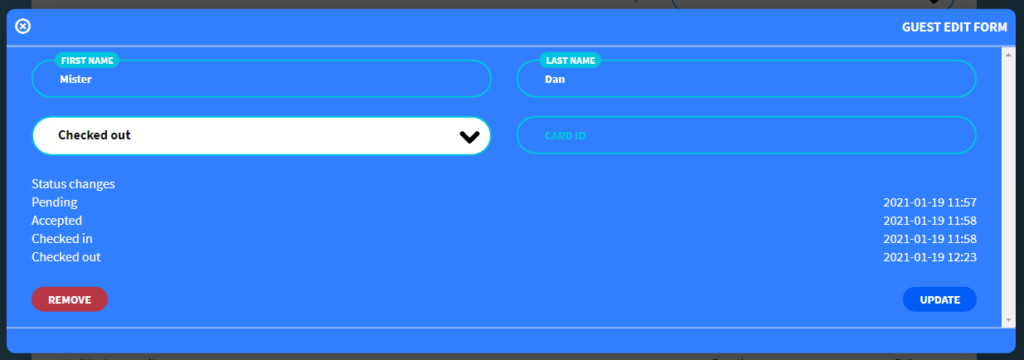
To edit an entry, simply click on the Edit button of the entry. You will find that a pop-up is shown where different details can be edited or the entry can be removed (this does not actually remove the entry from the list, only the status of the entry is updated to Removed). In this pop-up the history of statuses for this external user is also shown.
QR stickers
If you are an administrator and want the QR functionality to be enabled please contact your team manager or support@tableair.com
Once enabled, you will be able to receive the QR stickers for all of the workspaces and meeting rooms in your selected venue in a PDF format. To do that, go to the Settings section in the Dashboard:
Now click on the expand button in the QR check-in row. You will see all your venues and the number of workspaces in it:
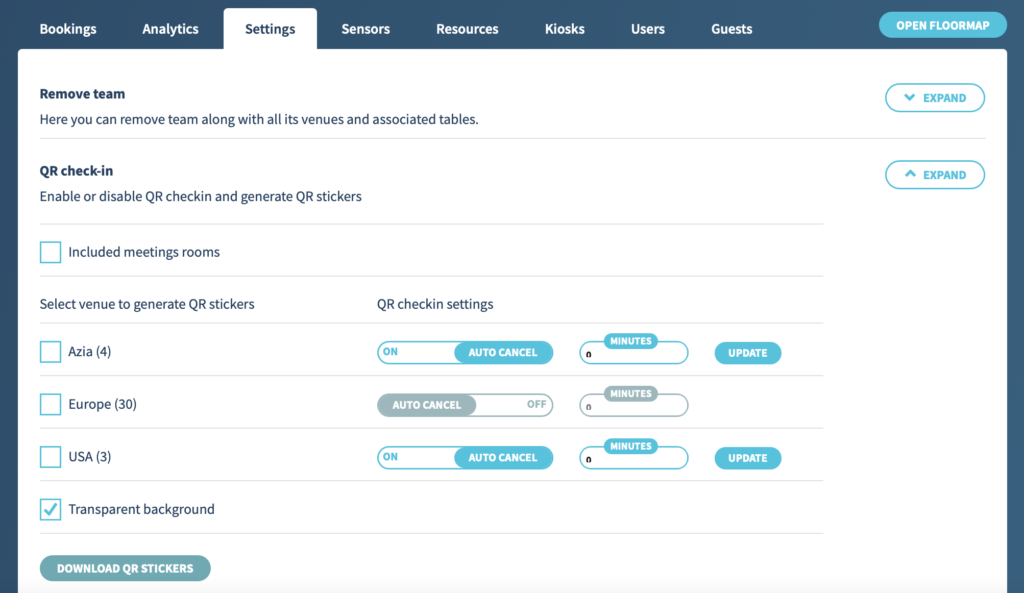
If QR stickers are also needed for the meeting rooms, tick the “Included meeting rooms” box and you will see that quantities shown next to the venues will change according to the number of meeting rooms at specific venues.
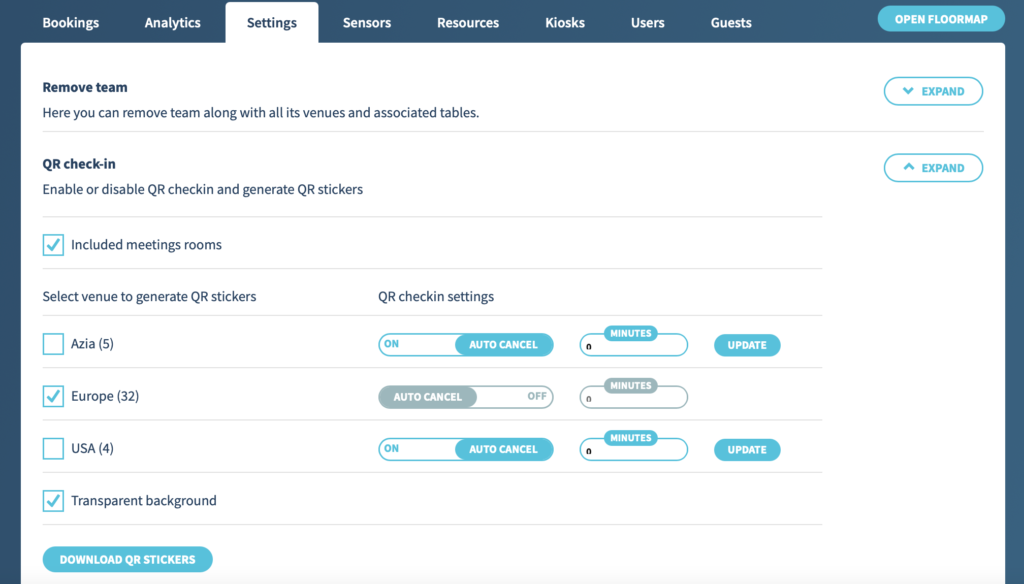
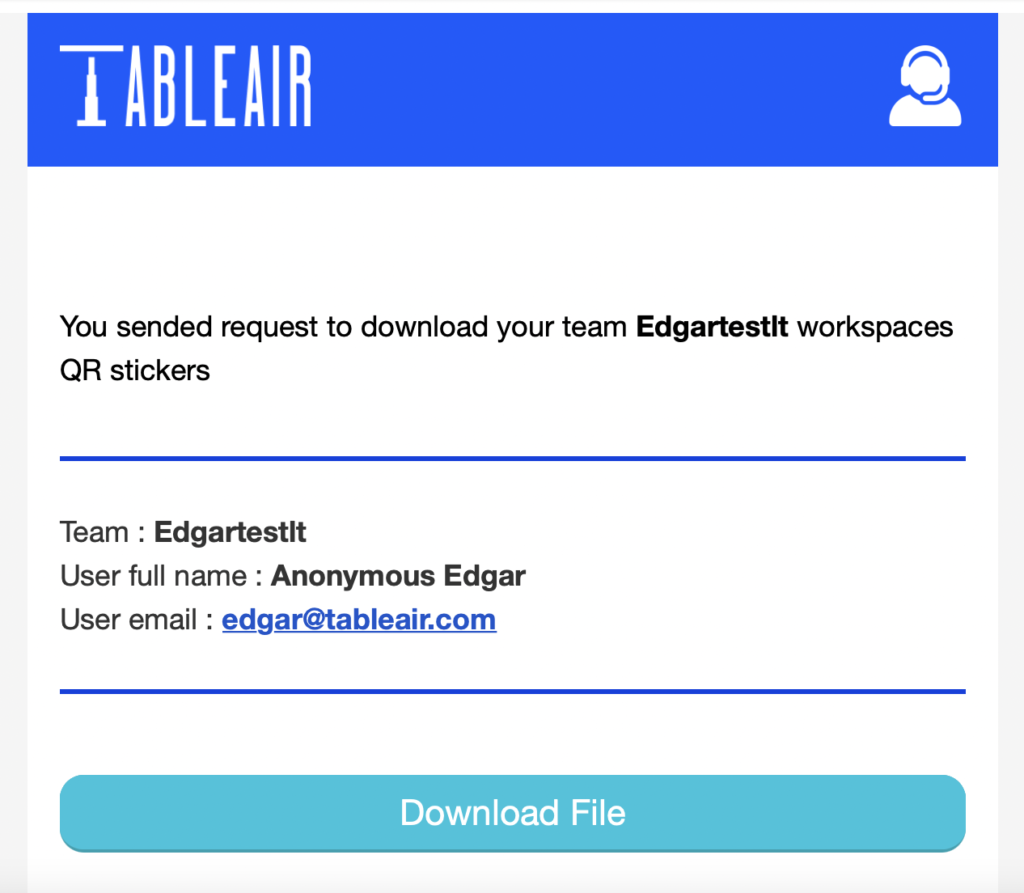
To enable the QR check-in feature and generate QR stickers, select the venue (-s) and click Download QR stickers. Once done, your will receive an email with a link to download QR stickers :
Additionally, you can select if you want the background to be transparent, otherwise it is white. Note that this does not actually change the background color, it is simply for informational purposes. You can also choose to autocancel bookings created on workspaces in a given venue after some time. With this feature enabled bookings of the users who create a booking using the web version but fail to check in will be removed. More information on the check-in process can be found in the Check-in app user manual.
To enable this feature, enable the auto cancel switch for the venue. To change the time after which bookings are cancelled, change the number on the right of the switch and click update. By default this value is set to 30 minutes.
The first page of the PDF will contain various information:
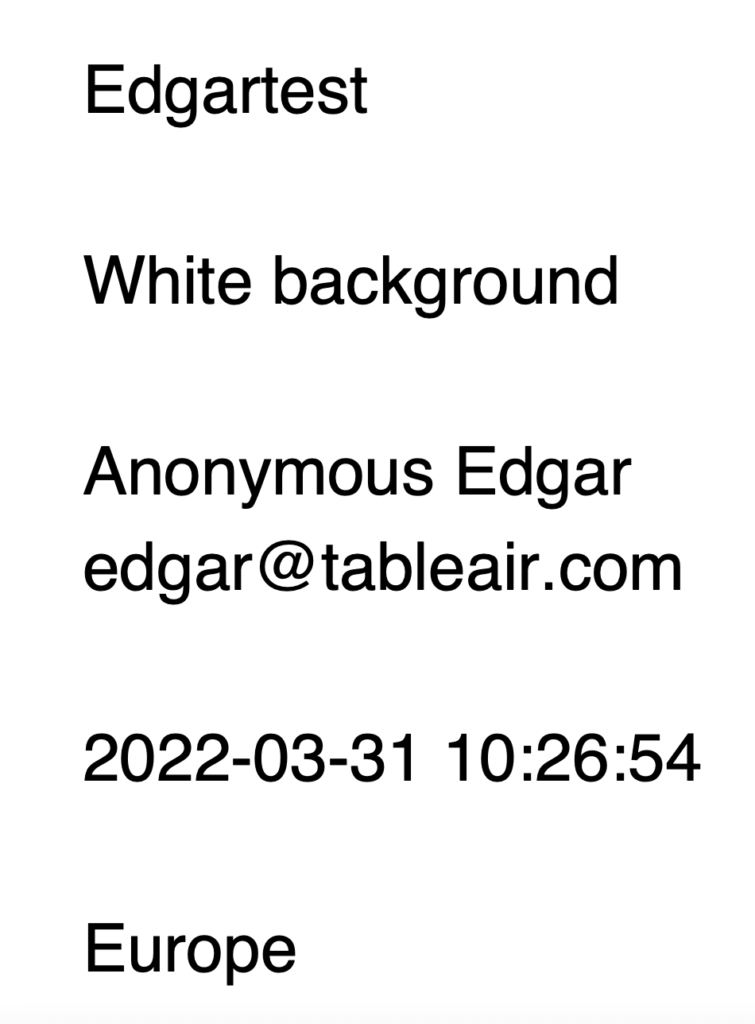
- Team name
- Background preference
- User responsible for generating the QR stickers
- Date and time of the generation process
- Venue
The other pictures in the PDF will be your QR stickers. An example of how it looks can be found below:
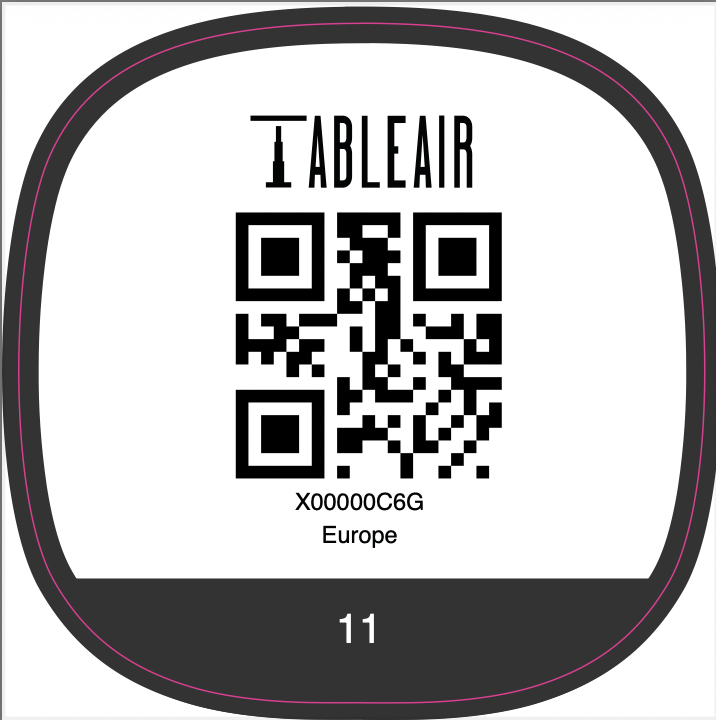
The QR sticker comprises of:
- Team logo
- QR code
- ID of the workspace
- Venue of the workspace
- Name of the workspace
The file is print-ready. It can be printed on simple paper or sticky paper to be used as stickers.