© Copyright UAB “TableAir” 2020
All rights reserved.
No part of this manual may be reproduced in any form, by print, photoprint, microfilm or any other means without written permission from the publisher.
In spite of all care taken in composing the text and illustrations, neither the editor nor the publisher can accept any liability for possible damage that might result from any fault that may be in this publication.
Information in this document is subject to change without notice and does not represent a commitment on the part of TableAir.
SB1 User Manual Version History
| Rev. 1.0 | 27th September 2019 | Initial document created. |
| Rev 1.1 | 4th June 2020 | Added additional connection instruction with Timotion and Jiecang leg controllers |
Hardware Version History
| Rev. A | 3rd September 2019 | Initial document created. |
Warnings and Statements
Introduction
The exclamation mark within an equilateral triangle is intended to alert the user to the presence of important operating and maintenance (service) instructions in the literature accompanying the apparatus.
Read this manual before attempting to start up or service the product. Retain the manual for future use. TableAir accepts no responsibility for any consequential loss, failure or damage resulting from a failure to heed any warnings or to follow the instructions.
Warnings
The SB1 may be operated only from the power adapter provided by TableAir. Operation from other supplies is not authorized.
The cables should not exceed 3 m in length.
Warranty and support services
Technical support
Should you need technical assistance please contact “TableAir” UAB.
Tel: +44 20 3322 4746
Email: support@tableair.com Web: www.tableair.com
Return Merchandise Authorization
Please contact via numbers above to receive an RMA number before sending your product back to us for repair. Products sent without an RMA number will be returned to sender.
One-year limited warranty
- This device is guaranteed against manufacturing defects for one full year from the original date of purchase.
- This warranty is valid at the time of purchase and is non-transferable.
- Damage caused by accident, misuse, improper storage, and/or uncertified repairs are not covered by this warranty.
- Warranty is only valid in the country of purchase.
- We assume no liability that may result directly or indirectly from the use or misuse of these products.
Technical specification
Smart Button 1 (SB1) technical specifications:
| Specification | Value | |
|---|---|---|
| Environmental | Usage temperature | +20°C to +25°C |
| Storage temperature | 0°C to +40°C | |
| Relative humidity | 5% to 95% (non-condensing) | |
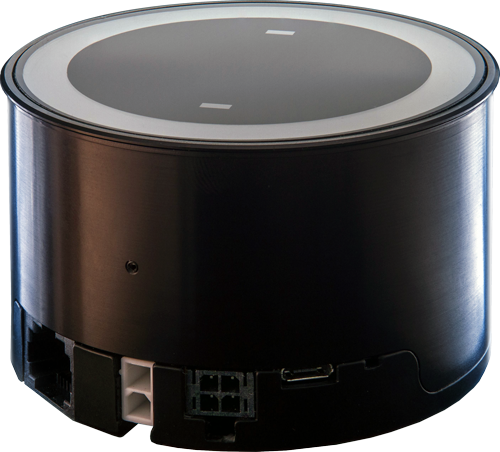
| Dimensions | Diameter | 75.5mm |
| Height | 47.1mm | |
| RF Operation | Bluetooth | 4.0 LE |
| Wi-Fi | 2.4GHz b/g/m | |
| Antenna | Internal | |
| Power Requirements | Supply Votlage | 24V to 40V |
| Operating Power | 10W | |
| External Connectors | Control box | RJ45 |
| Power | Molex 2 pin Mini-Fit Header | |
| Table LEDs | WE 4 pin Dual Row Header | |
| Sensors | Height | to 1m TOF sensor |
| Indicators | LEDs | 24 RGB LEDs |
| Speaker | Sound level <85dBA | |
| Firmware | Version | 722.01 |
| Control | Push Button | Tact Switch |
| Accessories | Ethernet Cable | 1m Patch Cable RJ45/RJ45 |
| Power from Linak cable | 1m | |
| Bracket | 2 pcs | |
| Self-adhesive cable holder | 5 pcs | |
| Quick start guides | 1 pcs | |
| Protection classes | Water Proof | IPX1 |
Introduction
Smart button 1 (later referred to as SB1) is a product designed to ease and simplify the use of height-changing tables. It is used to intuitively control the height of the table and change the color of the table’s lights (if available).
Click the Smart Button once and place your hand above the sensor. A blue ring will start filling up as it scans the distance to your hand. Hold it steady for a second. Once the distance is measured you can move your hand away, TableAir already knows how high it has to go up.
Click the Smart Button and hold it until the yellow ring is full – the desk will start lowering itself automatically. Release the Smart Button at the desired height.
Installation instructions
| What’s in the box? |  |
| SB1 structure |  |
Connecting the system steps:
| Linak leg control box: Connect the Ethernet cable to the SB1’s table control port and the LINAK leg controller’s A1 port. Connect the power cable to the SB1’s DC power port and LINAK’s DC power port.  Timotion leg control box: Connect the Ethernet cable to the SB1’s table control port and the Timotion leg controller’s H port. Connect the power cable to the SB1’s DC power port and the plug to the socket.  Jiecang leg controller box: Connect the Ethernet cable to the SB1’s table control port and the Jiecang leg controller’s F port. Connect the power cable to the SB1’s DC power port and the plug to the socket. 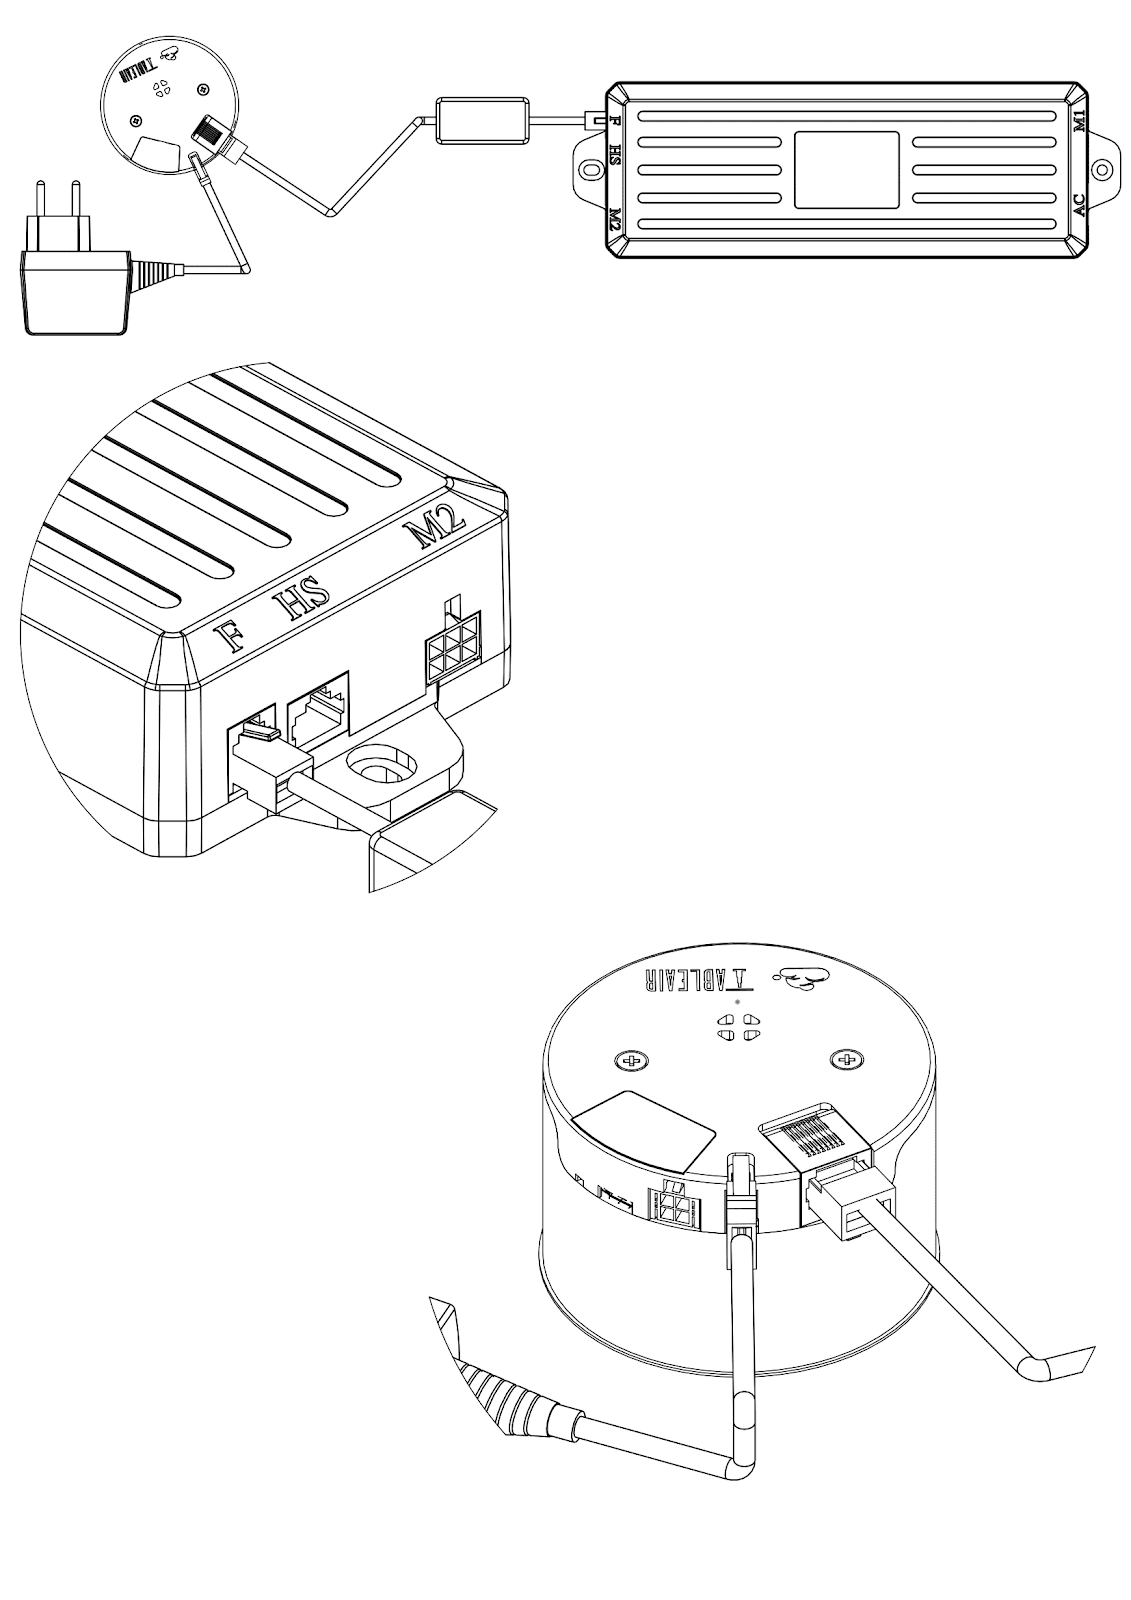 |
SB1 installation
Insert the SB1 device top down into the table plate and turn so that the distance sensors are parallel to the short edge of the table.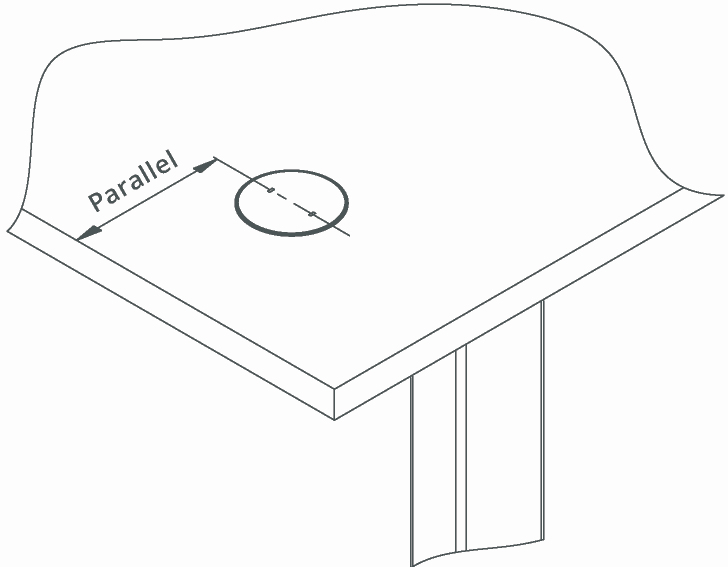 Remove the protective film from the brackets and attach them to the table plate and the device. Fix the brackets parallel to the short edge of the table. 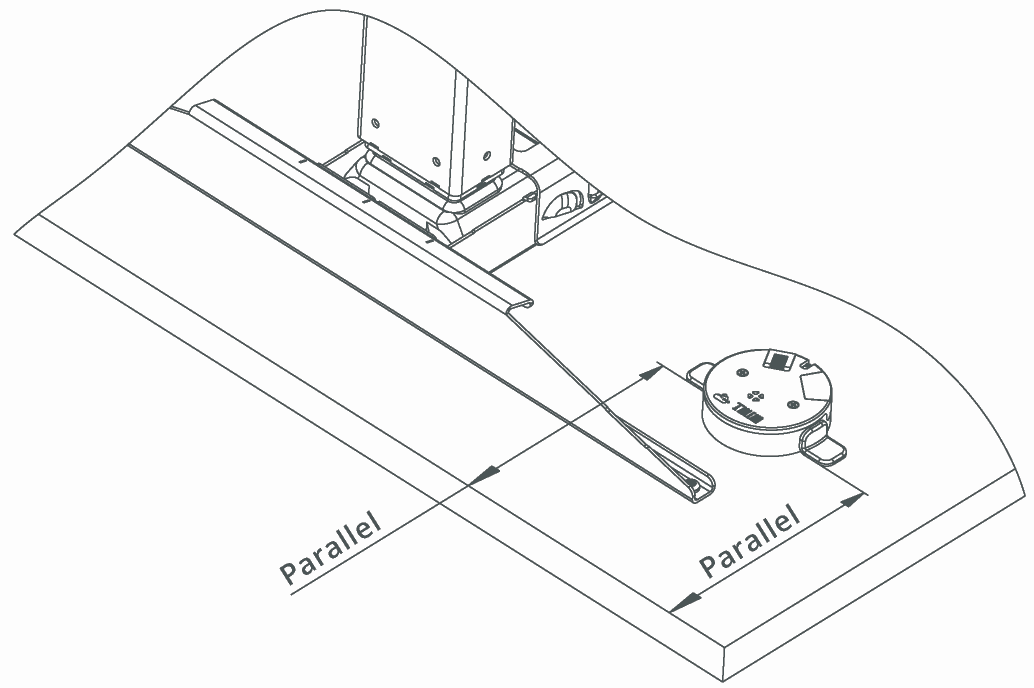 Table-top thickness must be at least 12 mm and up to 25 mm. SB1 device mounting hole diameter ranges from 73.2 mm to 73.6 mm. 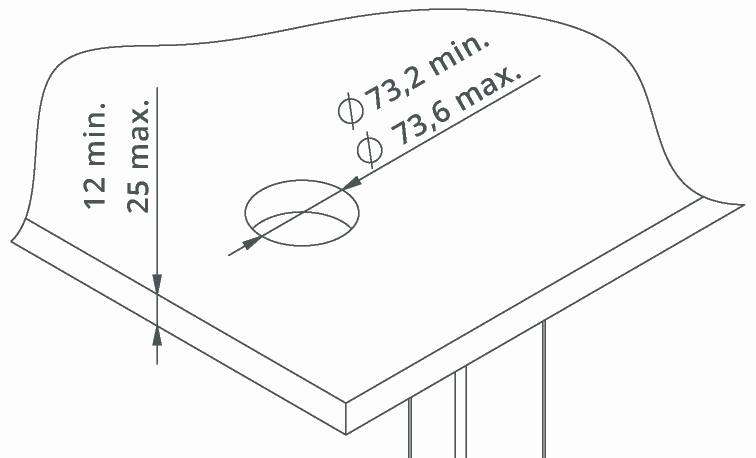 Note: Cord length is 1 meter. This should be considered when installing the SB1 device to the leg controller. To guarantee sufficient cord length the SB1 device should be located near the leg controller. |
Software setup
In order to use SB1 devices you need to have an account and belong to a team. If you are not sure, please contact your supervisor for more information. If you want more information about team creation and app usage please visit our Introduction to TableAir Cloud Manual and the Administrators’ Manual. In order to add sensors to your team you will need to download the TableAir app (either on iPhone or Android device) and you will need to have administrator rights in your team.
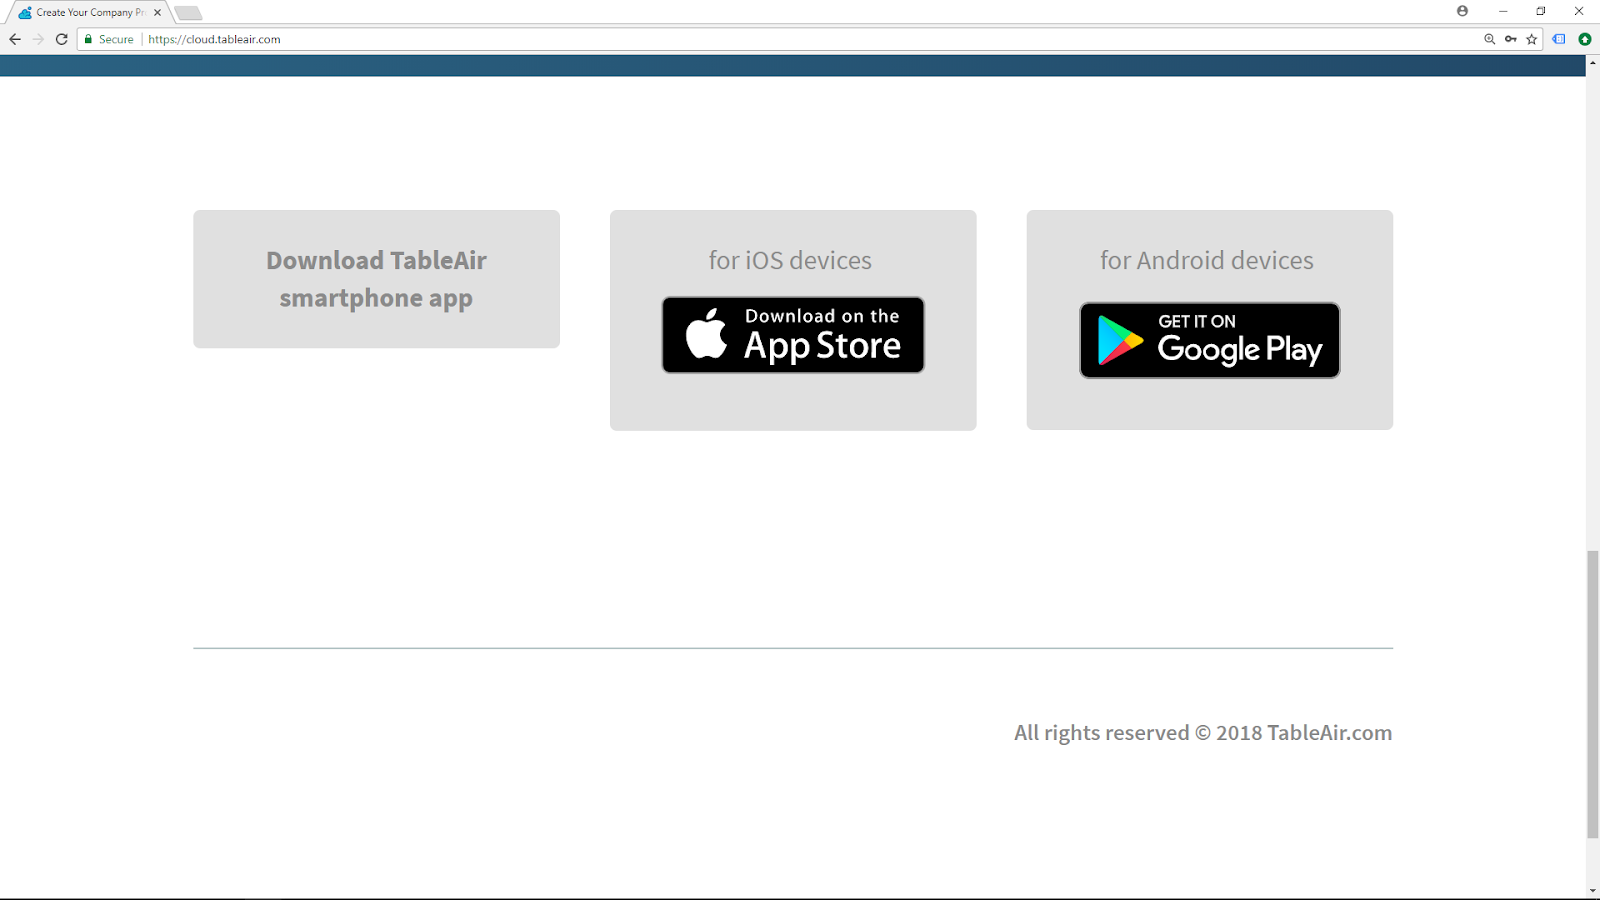
Downloading the TableAir app
Download the TableAir app on your smartphone device. You can find it on the App Store for iPhone devices and on Google Play for Android devices
Logging into the app
Launch the TableAir app you have just downloaded and log into your TableAir Cloud account.
Make sure both Bluetooth and WiFi are enabled on your mobile device.
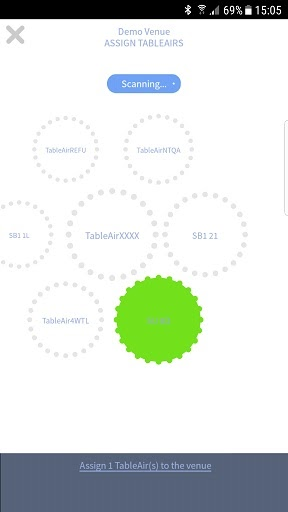
Assigning tables to the venue
After logging into your account, select the team and venue, and then tap on the icon in the bottom left corner of the app.

You’ll see all the free unassigned tables in the venue. Select the ones you’d like to add to the system and tap ‘Assign’ to proceed. All unassigned tables are selected by default.
Select the WiFi network or type the hidden WiFi network name that you want the tables to be assigned to (this will help to track the table usage real-time).

Enter your WiFi password. You’ll receive a confirmation message if everything has been done correctly.
Firmware update
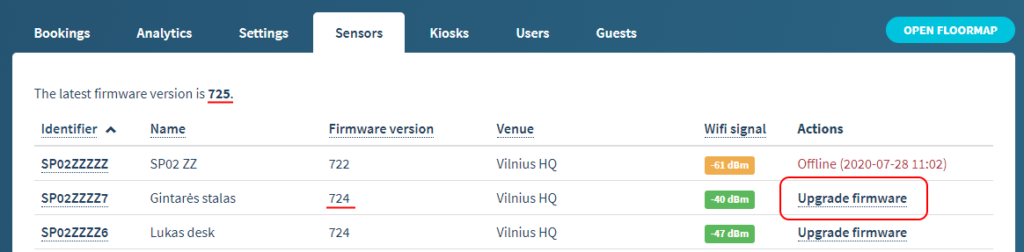
For the device to work properly it must be up to date. Firmware updates are released regularly and upgrade various parts of the device. You can see the latest firmware version in your Dashboard under the Sensors tab.
In the same Sensor tab in the Dashboard you are able to see the current firmware version of all of your devices.

There are a couple of ways to update your firmware.
Firmware update using Bluetooth
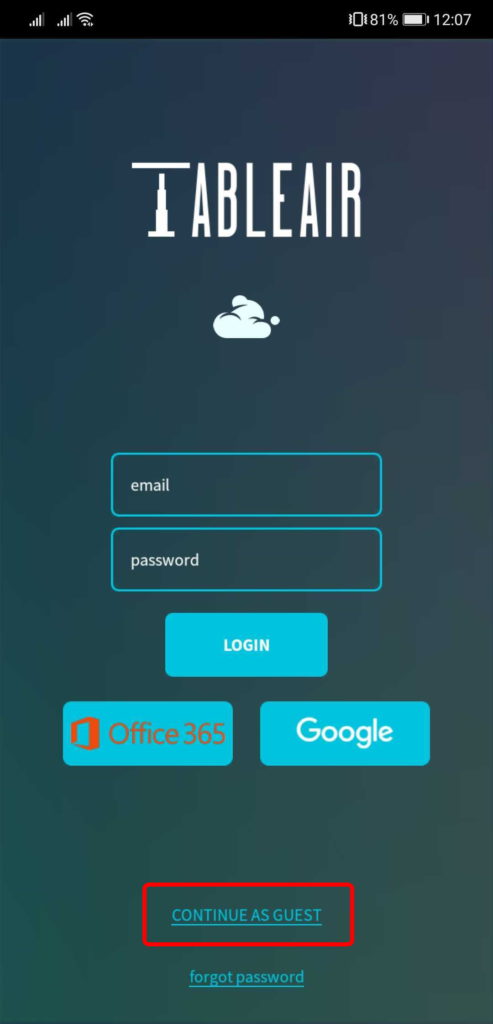
If your device is not up to date, once you connect to the device using the TableAir app through Bluetooth you will get a pop-up notifying you about that. You will be prompted to update your device.
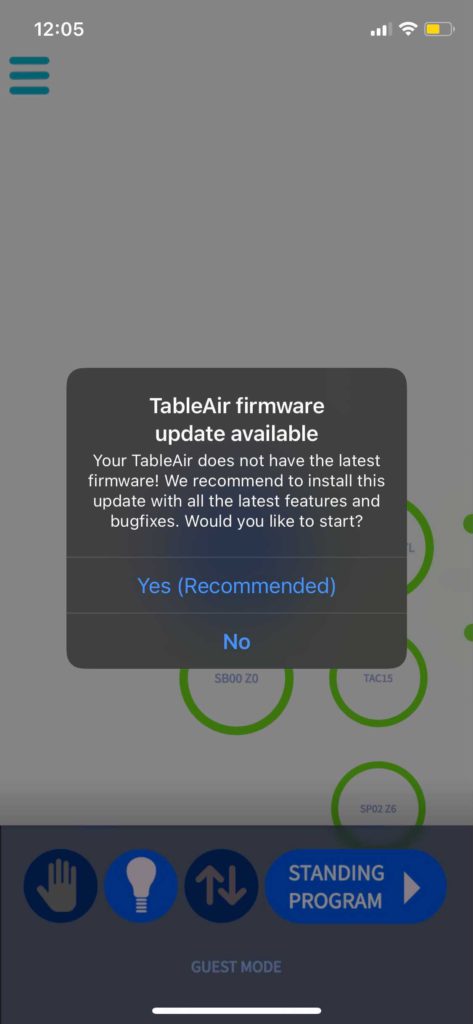
Connecting to the device is possible if you have a booking on that device, so in other terms, checking in. The other way you can connect to a device is by being logged out and using Guest Mode. Once in Guest mode, all of the devices are shown and you can connect to either one of them.
Firmware update using the Dashboard
If the device is connected to the Internet and there is a firmware upgrade available, you will see it in the Sensors tab in the Dashboard. Under the Actions column look for the Upgrade sensor button.
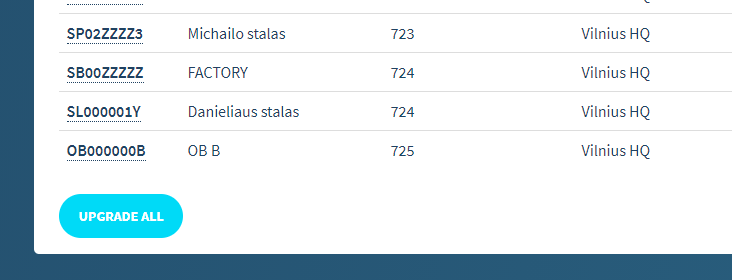
It is also possible to update all of the devices by clicking the UPGRADE ALL button which is located at the bottom of the Sensors tab.
Functionalities and LED ring color meanings
SB1 is controlled with button presses – the amount of presses corresponds to the option which is controlled.
After pressing the button the desired amount of times, just put your hand above the button and move it up or down. This action controls the selection. When chosen, just hold the hand on the same level to confirm your selection.
| 1 press | Set table height | The table will change it’s height to match your hand. |
| 1 press, holding | Decrease table height | Table height decreases while you hold the button. |
| 1 press, holding to lowest state | Calibrates table height sensor | Lowering the table to the lowest position will recalibrate the table height sensor. |
| 2 presses | Turn on, and/or change table LED bar color (if available) | Moving your hand up and down scroll through the different available colors. |
| 3 presses | Shutdown table LED bar (if available) | Turn the LED bar on the table off, if it is on. |
| 4 presses | Change SB1 LED brightness | Moving your hand up and down increases or decreases LED brightness. |
| 5 presses | Change table LED bar brightness | Moving your hand up and down increases or decreases table LED bar brightness. |
| 7 presses | Change button click volume | Moving your hand up and down increases or decreases the button option to change sound volume. |
SB1 LED ring color meaning
 Bright Green | Not occupied, not booked | The table is free to use. |
 Spinning bright blue | Booked, not occupied | The table is booked but there is nobody present at the table. |
 Dark Blue | Booked, occupied | The table is booked and somebody is at the table. |
 Changing Yellow/Off | Table height is decreasing | The button is being held and table height is decreasing. |
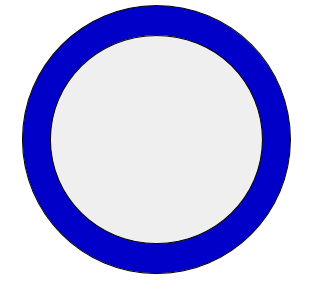
 Cyan filling up | Table is waiting for height input | The LED ring is filling up, when it fills up, the sensor checks the height of your hand and raises the table. |
 Changing Cyan/Off | Table height is increasing | The table is increasing it’s height to match the height of your hand. |
 Blue LED slowly pulsating | Smartphone connected to SB1 | A smartphone is connected to the SB1 through bluetooth. |
 Orange LED slowly pulsating | SB1 indicates issues with WiFi | SB1 device is unable to connect to WiFi with configured credentials. |
Mobile app overview
The table can be controlled with the TableAir mobile app. To learn how to book and connect to a table please refer to the TableAir Cloud User Manual.
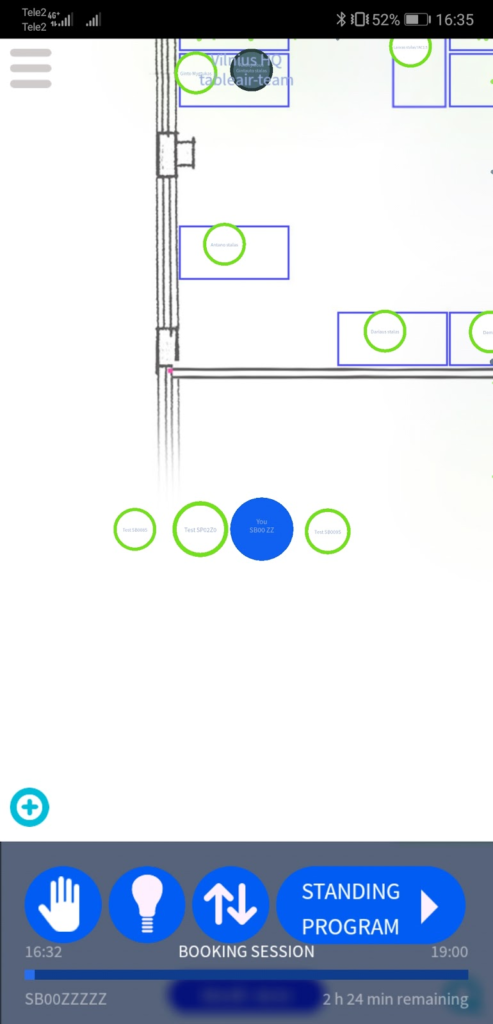
 | Manually change the height of the table. |
 | Manually change table LED color. |
 | Change between sitting and standing modes. |
 | Turn on the Standing Program. |